.svg)
Setting up a Driftrock Smart Form
How it works
- Create personalised lead forms with a custom landing page, optimised for mobile devices.
- Easily customise your forms with images, formatting text and content blocks.
- You can include tracking pixels for each channel to optimise and track your forms.
- Send hidden fields and transform incoming data for compatibility with your CRM.
Getting started
Click save at any point to have an updated view of your Smart Form.
- When you are writing your copy, you can add some formatting options (highlighting, bullet points, bold).
- We will store the information to indicate customers who are consenting to marketing.
- You can add tracking information to your forms, this allows you to track the conversion of your forms.
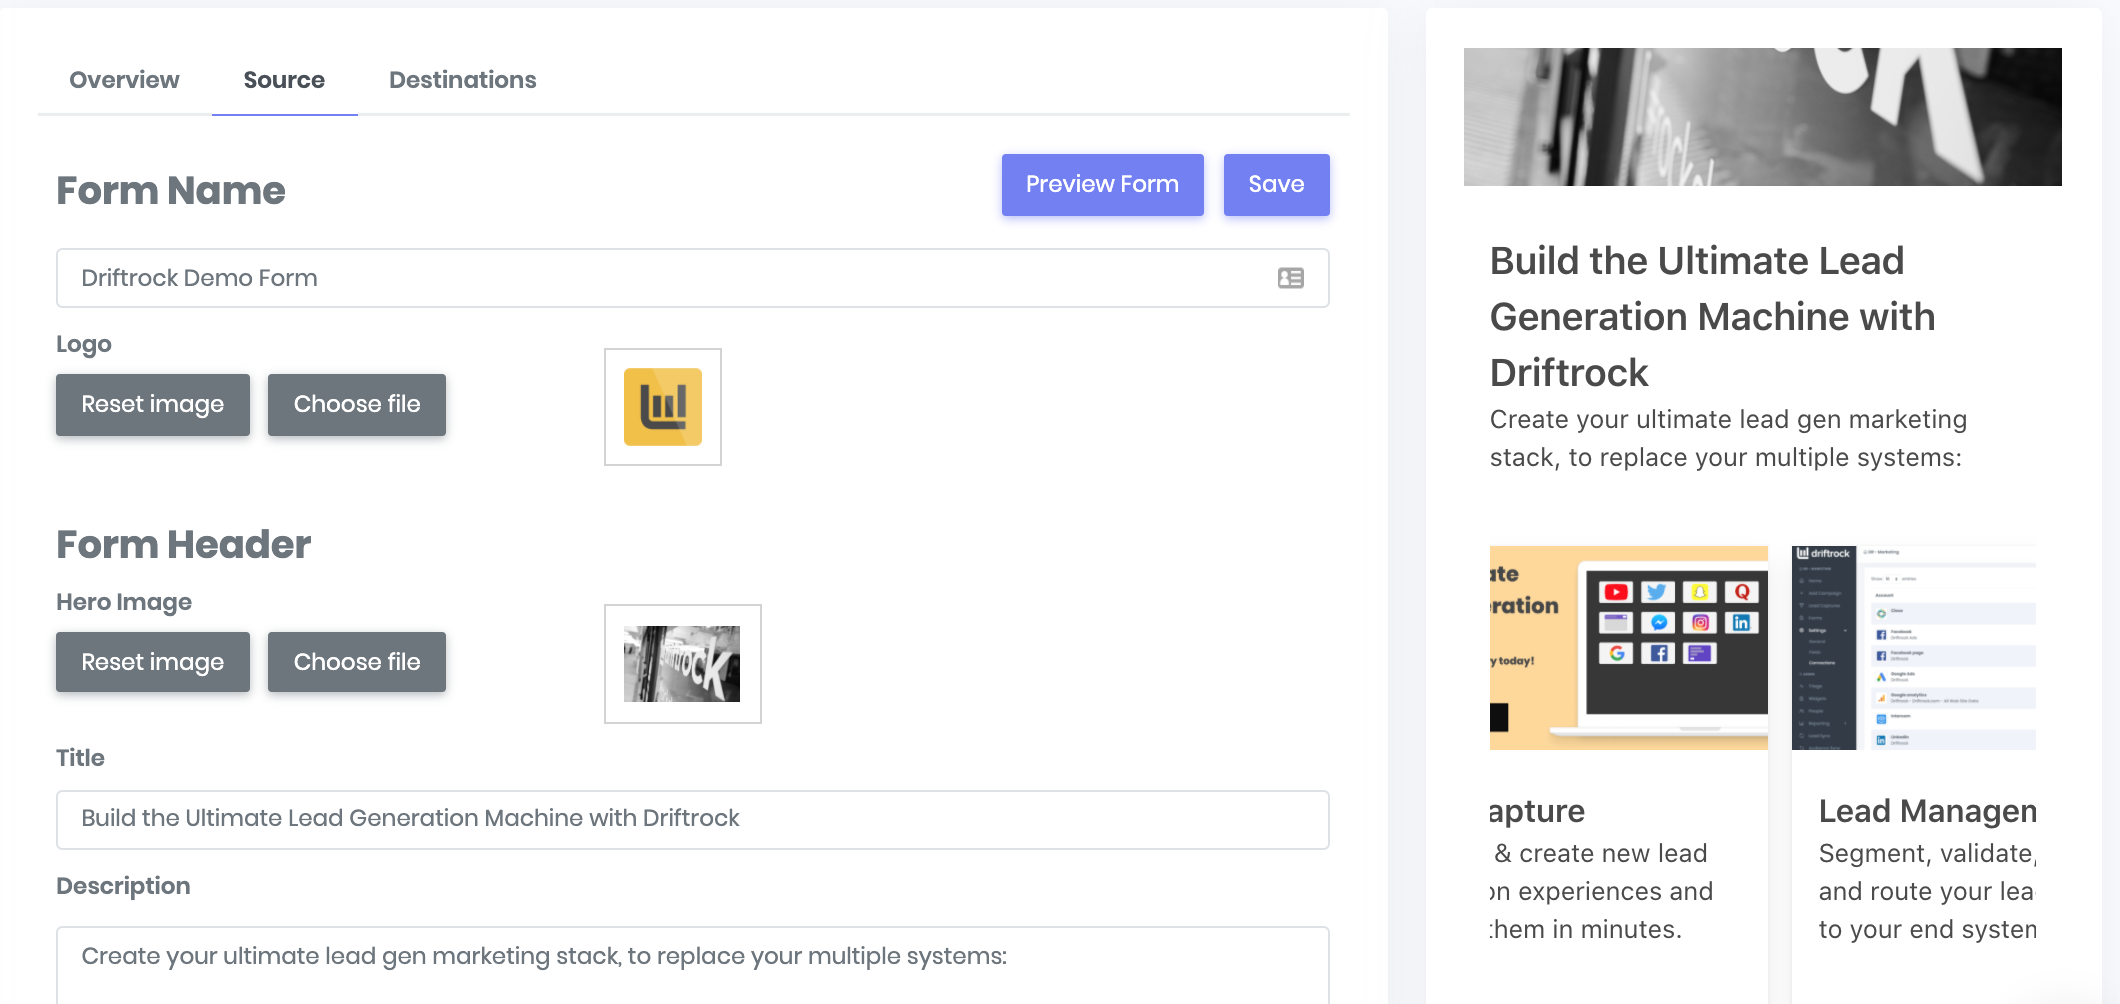
Building your custom form
> Step 1: Add your title, text and images
Add your text, logo and header images (select text with the mouse if you would like the formatting toolbar to appear).
You can include content blocks which gives your users more information through images (appears in a carousel on mobile).
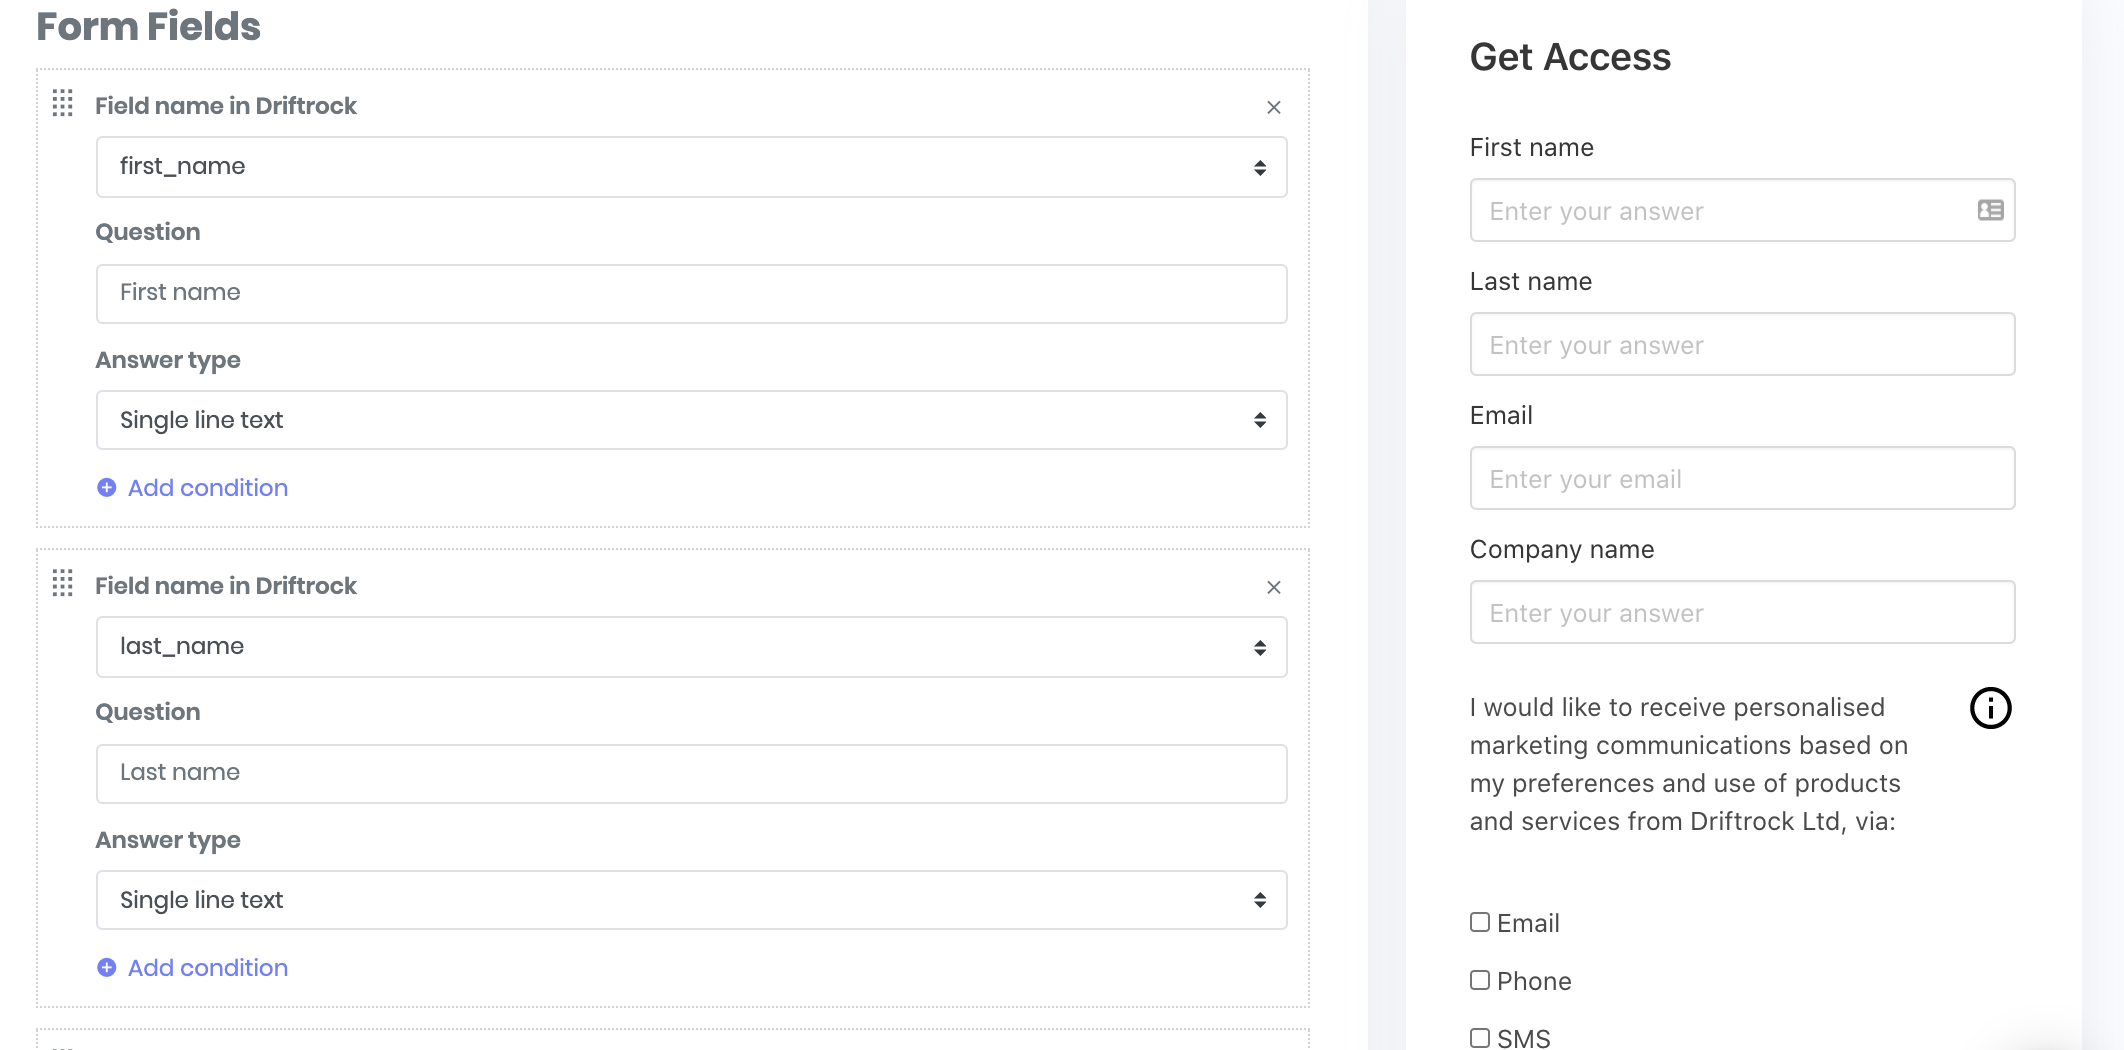
> Step 2: Start adding your questions
Start adding your fields and you will have a selection of Driftrock Fields (you also have the option to add a new custom field). Once you have selected your field, you have the option to change the question text.
> Step 3: Add consent information you would like your user to view
- We will store the information to indicate customers who are consenting to marketing.
- You can attach your privacy & policy URL in the Form Builder
> Step 4: Customise your thank you page
- Add an image, title and text to your page
- You can link a URL that you would like your user to visit after finishing the form
> Optional: Add tracking pixels to your form
> Optional: Add static fields to the form
Using static fields allows every lead to have a hard coded field that will be attached to every lead a user submits.
Once each static value has a DR field, these fields will be mapped to a CRM field in the next stage.
> Optional: Transform incoming Driftrock fields
You have the option to transform the values for an incoming field using a lookup table. For example, if you wanted to convert a range of model names to numerical IDs, you would set up a transformation field.
Connecting your form to your CRM
Now that you have created all the fields while building your form, you can now map them to your CRM. Head to the Source section and select the CRM system you use.
Send Driftrock data to CRM
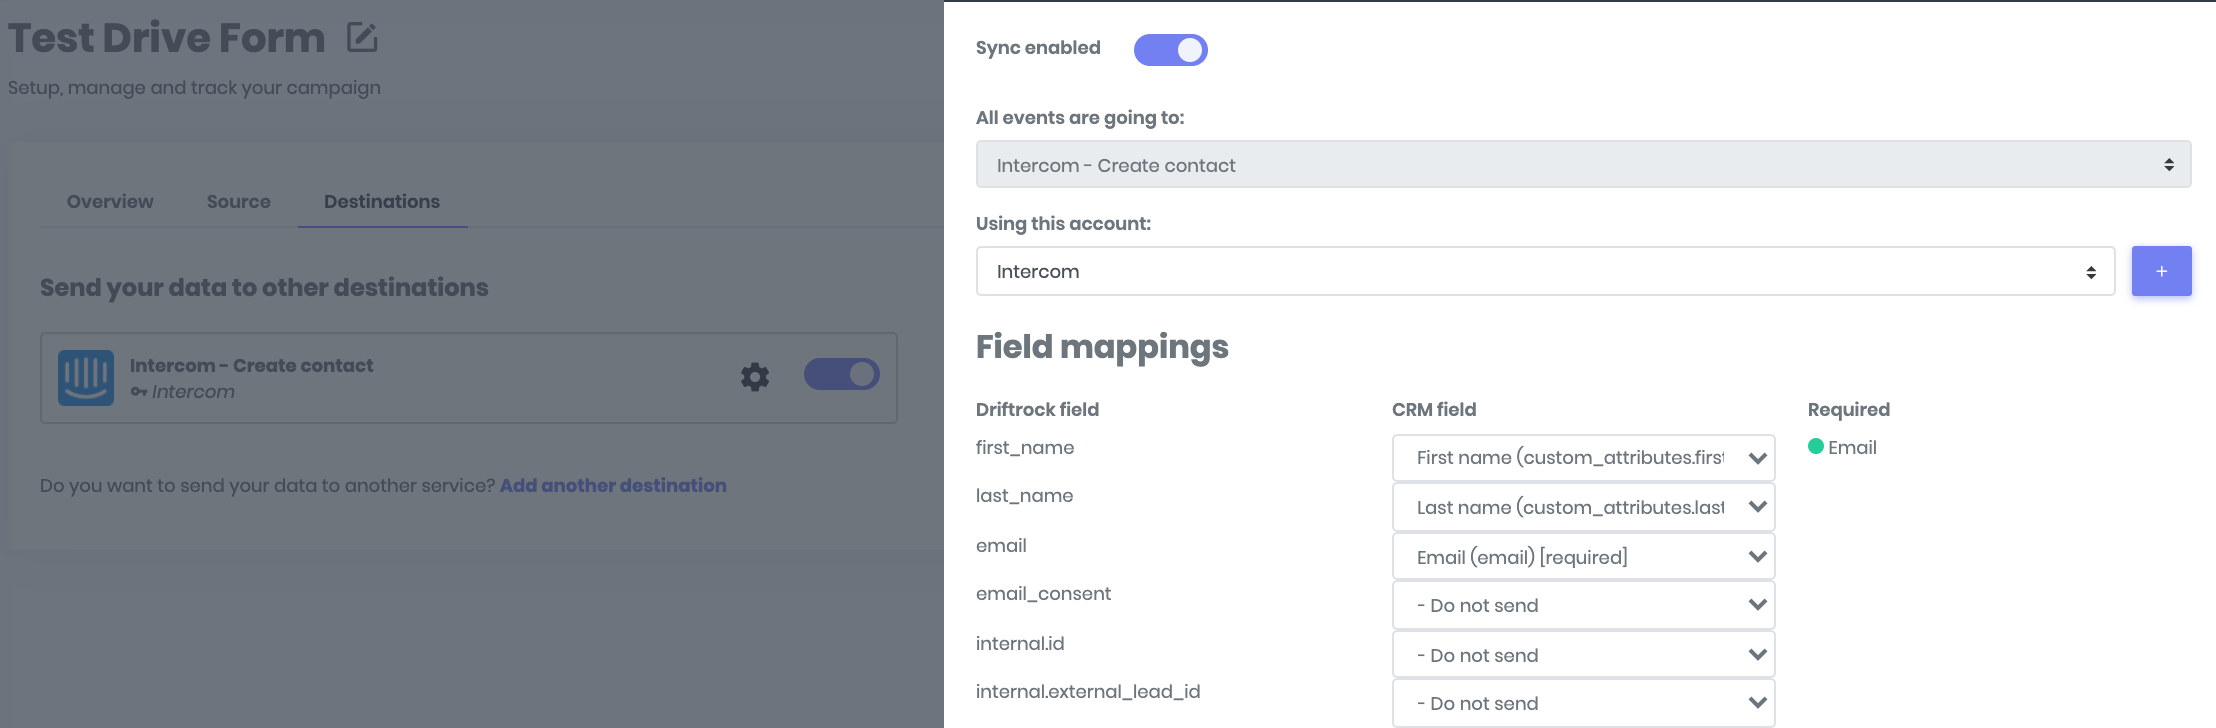
Now that you have built and customised your form, the final stage is to map your Driftrock fields to your CRM. Head over to the Destinations section and select your CRM.
> Step 1: Select your destination & environment
You will be given the option to select a new destination where you will choose your CRM platform. Your Driftrock fields will appear, start mapping them to your CRM fields.
Once you’ve mapped all your fields, enable the capture by switching ‘Sync enabled’ on at the top of the page.
Note: Once you have finished setting up your smart form, head back to your lead captures and activate the sync.